
How to add a simple Sales Countdown Timer to your Shopify Theme

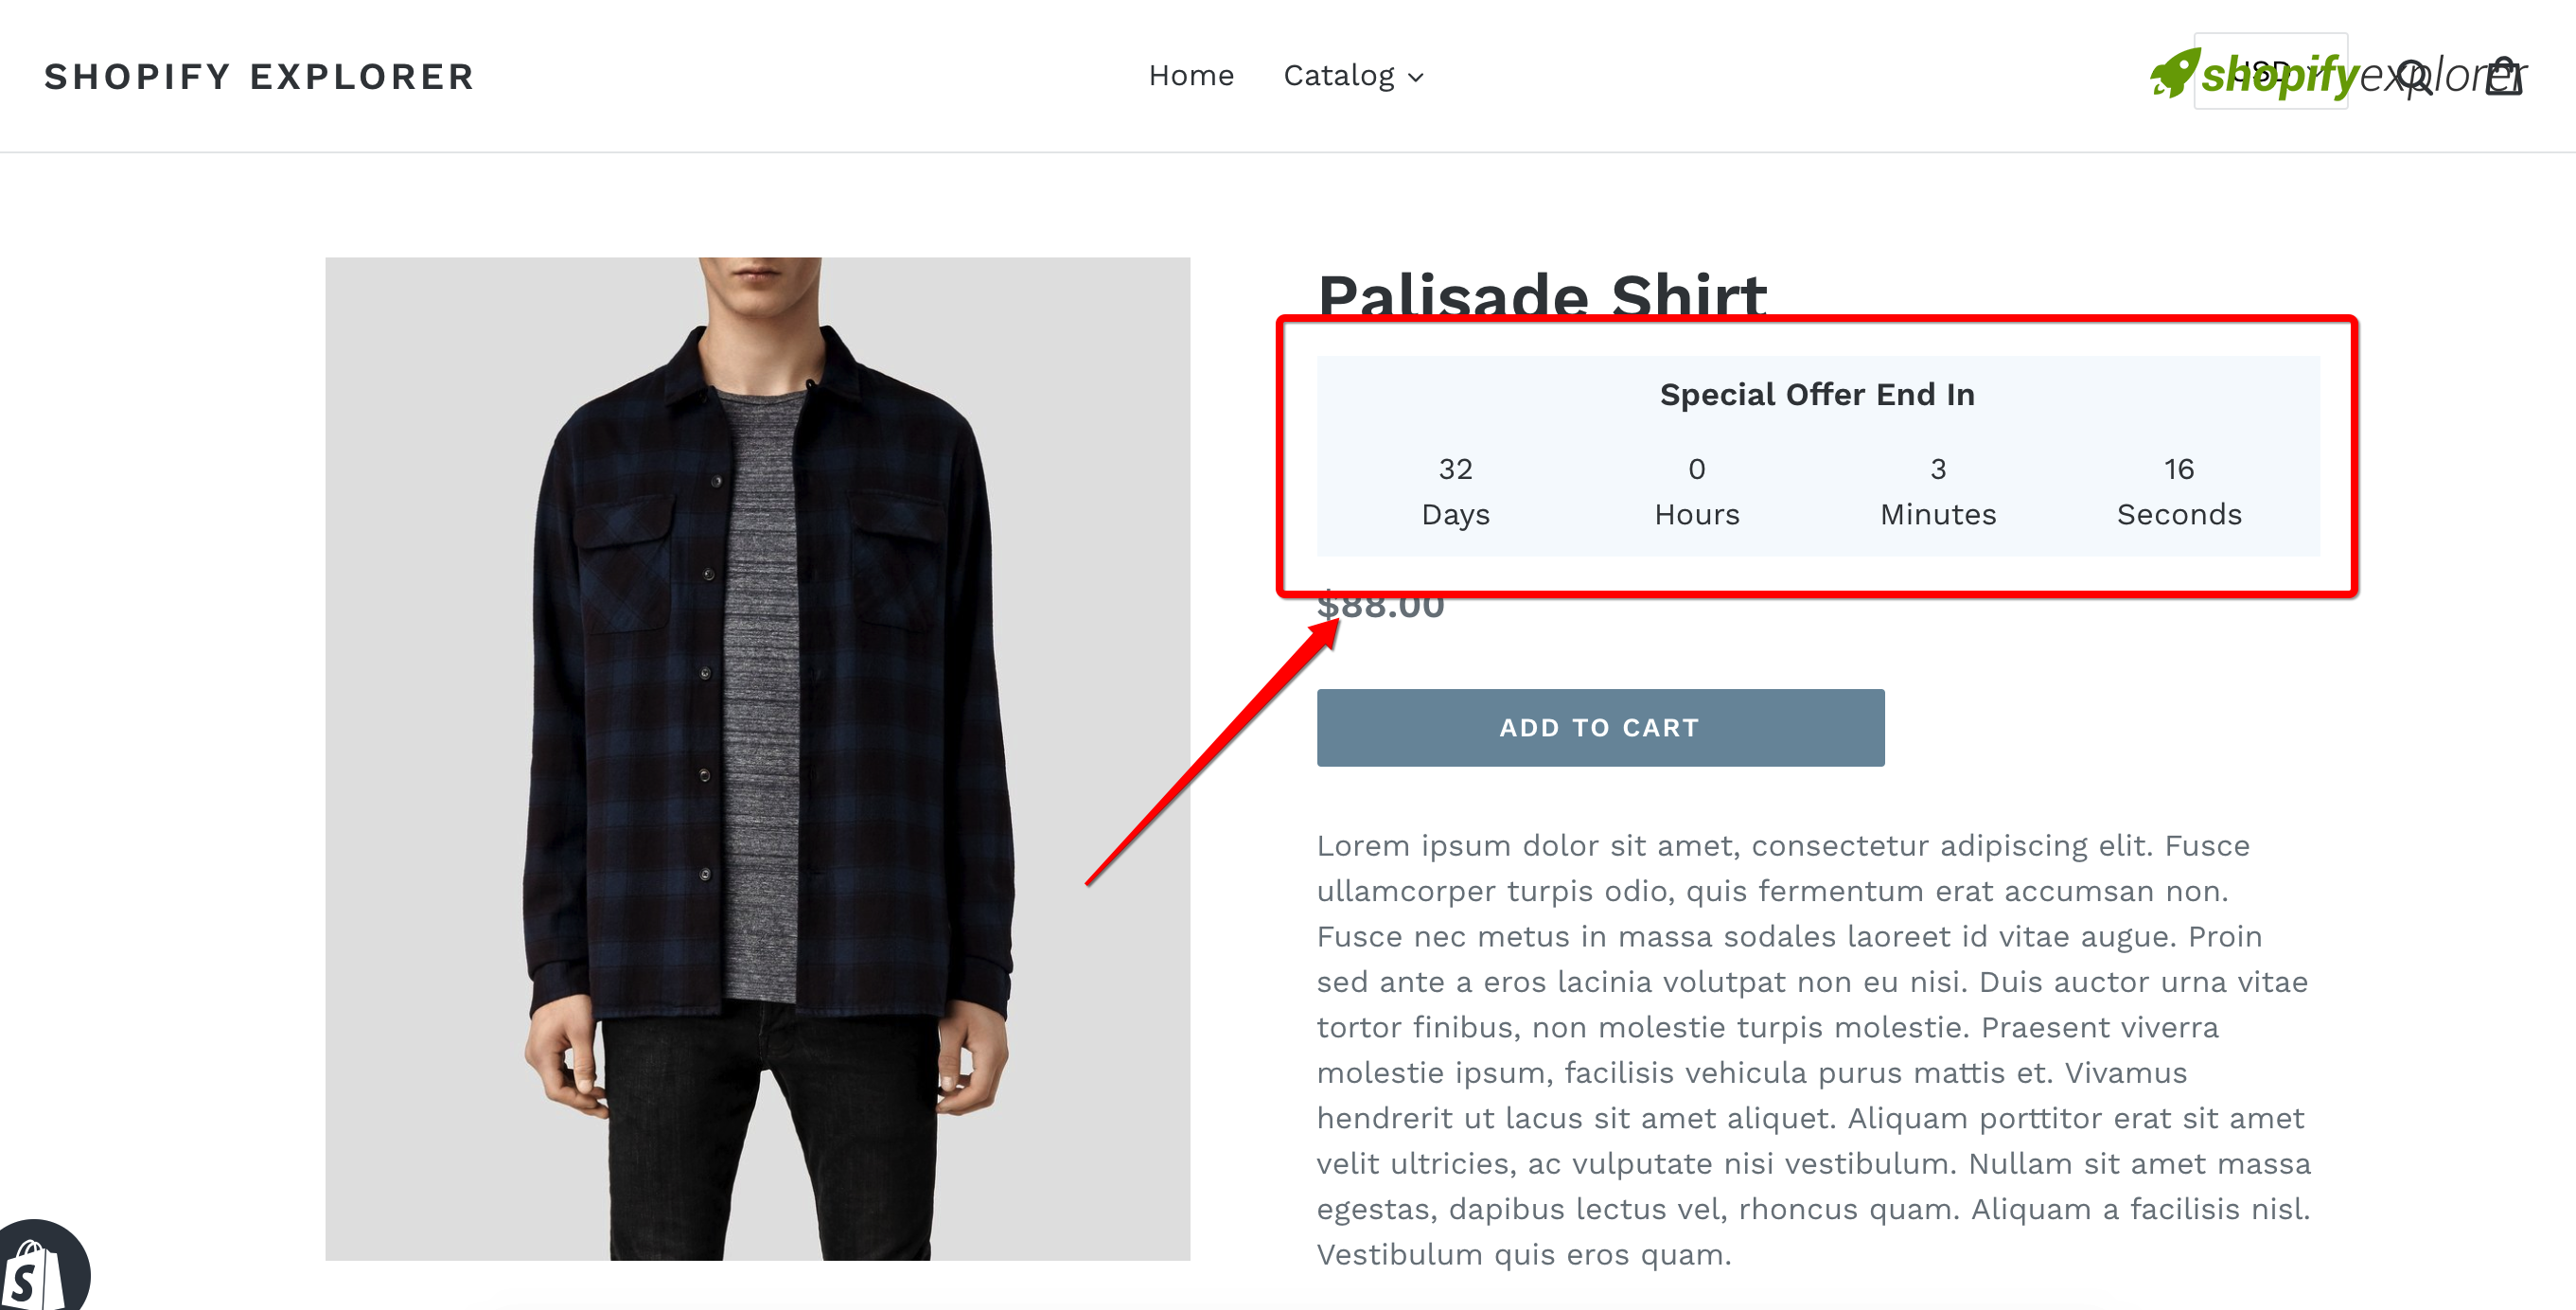
Countdown timer is a popular featured appear on almost store. It is a powerful technique to push online shoppers into making faster decisions on purchases they are thinking about. However, it’s not something that Shopify enables you to implement out of the box. Therefore, the most efficient method to add a countdown timer in Shopify is to use an app. In this tutorial, I would like to show you how to add a simple Sale Countdown Timer to your Shopify theme. This is very easy and step by step detail
Update on Nov 27: How to automatically reset Countdown Timer on your Shopify Theme
How to add a simple Sales Countdown Timer to your Shopify Theme
Step 1: Add a new theme snippet
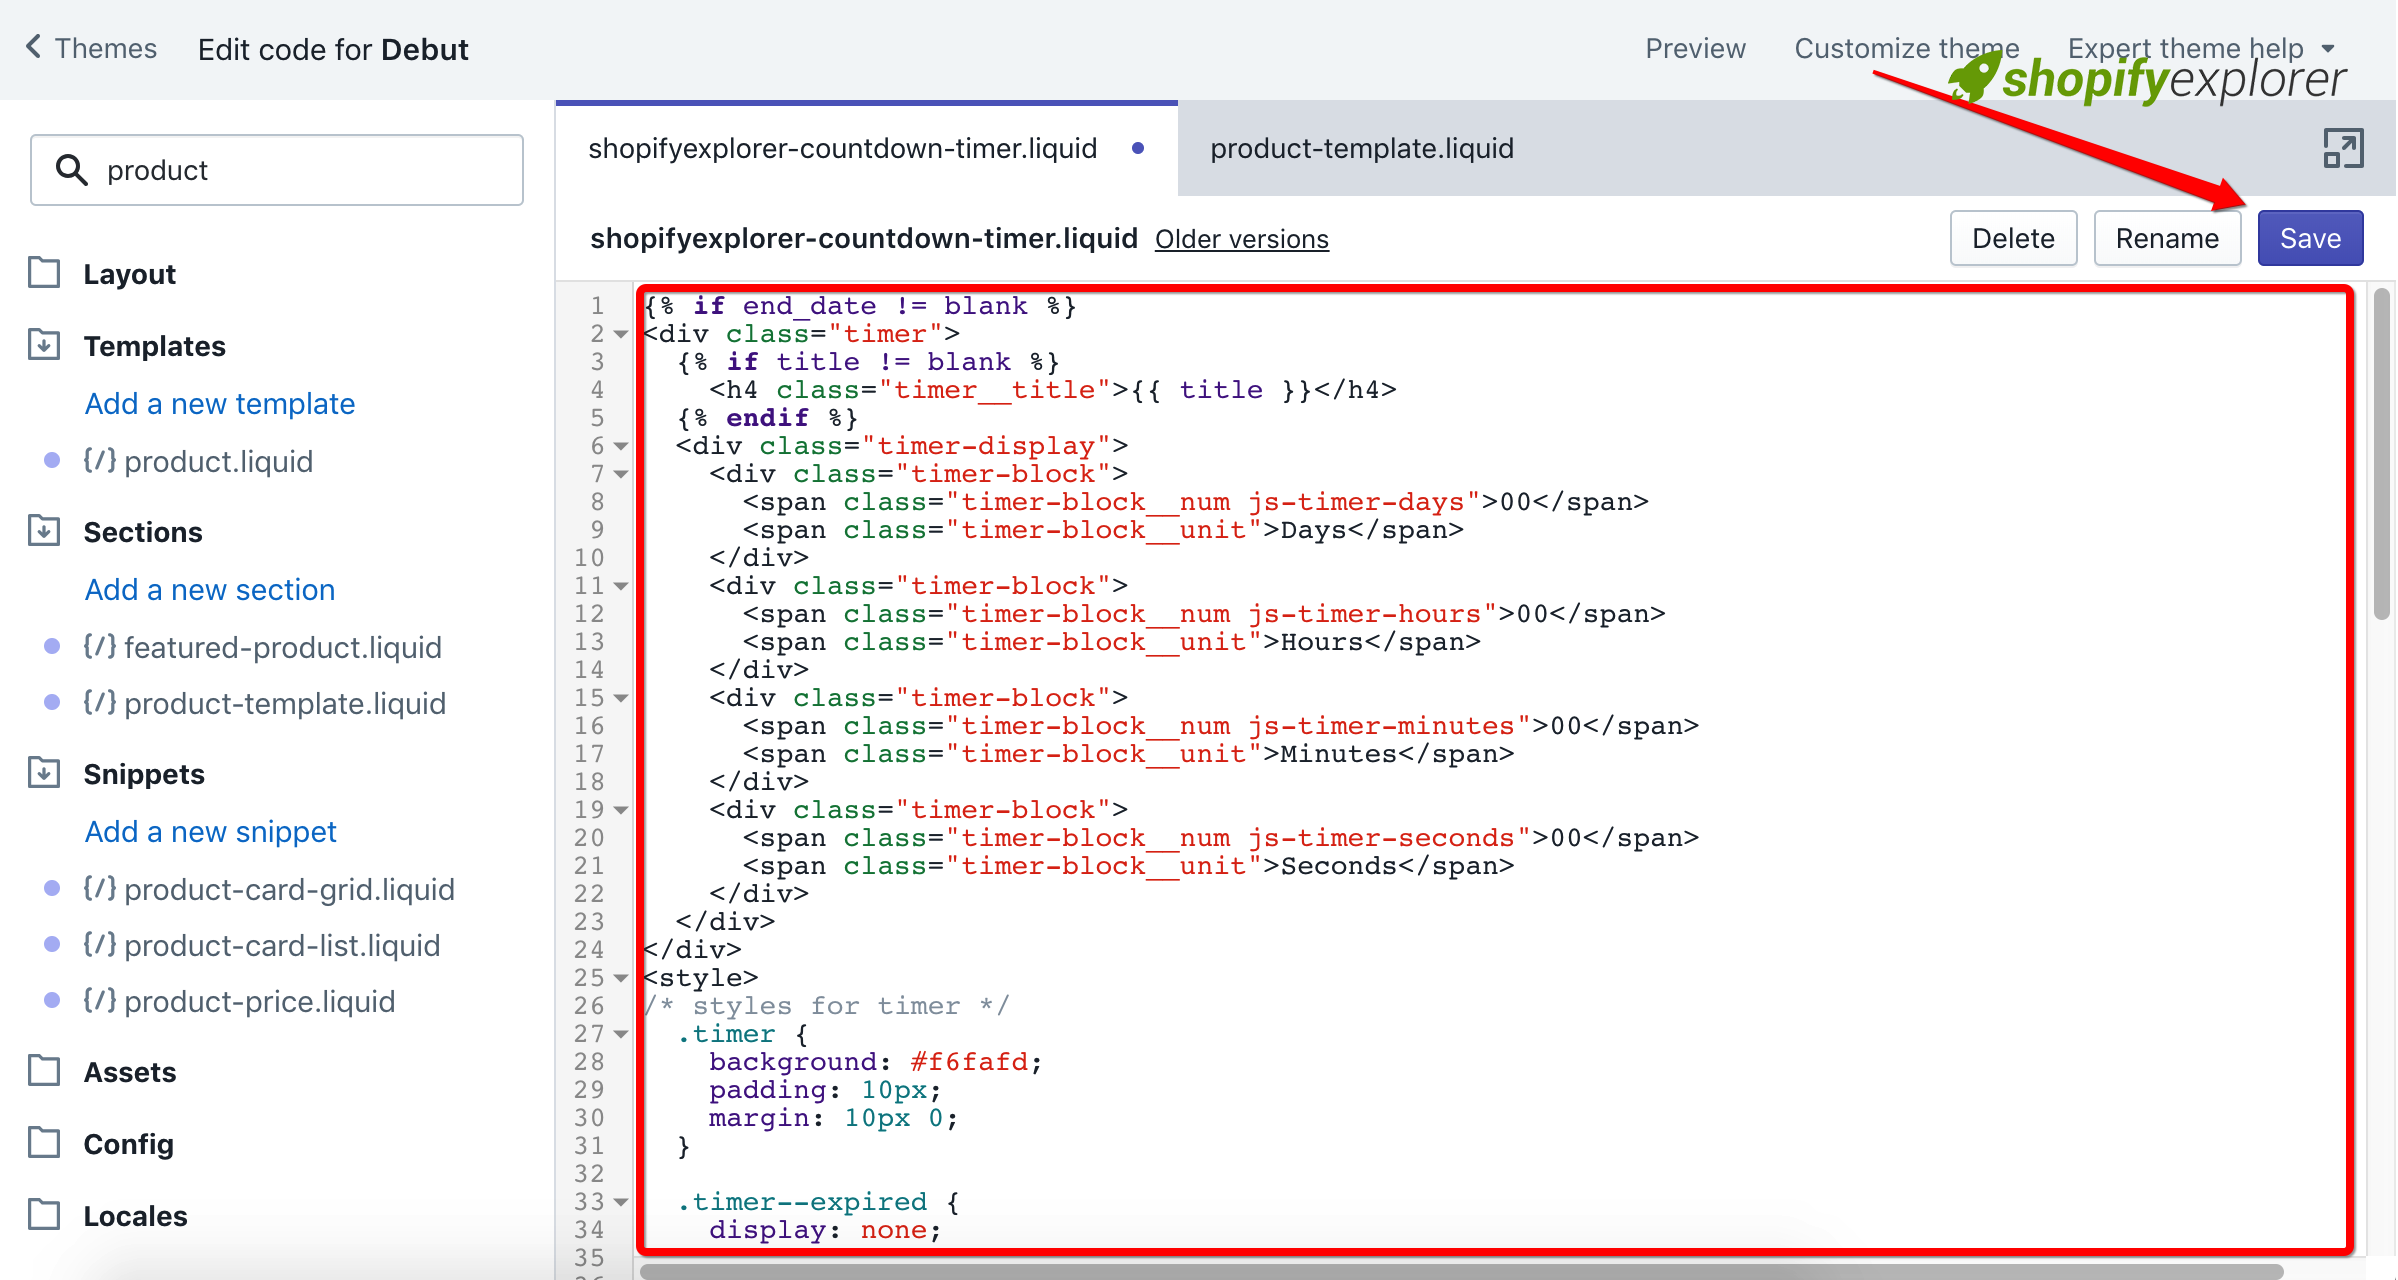
The very first step adding new snippet to your theme. From Shopify Dashboard, navigate to your Theme editor

Add new snippet with name ecg-countdown-timer
Like this screenshot bellow:
After creating a new snippet, paste the following code into it and Save snippet file
{% if end_date != blank %}
<div class="timer">
  {% if title != blank %}
  	<h4 class="timer__title">{{ title }}</h4>
  {% endif %}
  <div class="timer-display">
    <div class="timer-block">
      <span class="timer-block__num js-timer-days">00</span>
      <span class="timer-block__unit">Days</span>
    </div>
    <div class="timer-block">
      <span class="timer-block__num js-timer-hours">00</span>
      <span class="timer-block__unit">Hours</span>
    </div>
    <div class="timer-block">
      <span class="timer-block__num js-timer-minutes">00</span>
      <span class="timer-block__unit">Minutes</span>
    </div>
    <div class="timer-block">
      <span class="timer-block__num js-timer-seconds">00</span>
      <span class="timer-block__unit">Seconds</span>
    </div>
  </div>
</div>
<style>
/* styles for timer */
  .timer {
    background: #f6fafd;
    padding: 10px;
    margin: 10px 0;
  }

  .timer--expired {
    display: none;
  }

  .timer__title {
    @extend .paragraph;
    text-align: center;
  }

  .timer-display {
    display: -webkit-box;
    display: -ms-flexbox;
    display: flex;
    -ms-flex-wrap: wrap;
        flex-wrap: wrap;
    -webkit-box-pack: justify;
        -ms-flex-pack: justify;
            justify-content: space-between;
    margin-top: 5px;
  }

  .timer-block {
    position: relative;
    width: 25%;
    padding: 0 10px;

    &:not(:last-child):after {
      content: ':';
      position: absolute;
      right: 0;
      top: 3px;
    }
  }

  .timer-block__num,
  .timer-block__unit {
    display: block;
    text-align: center;
  }
</style>

<script type="text/javascript">
  var second = 1000,
      minute = second * 60,
      hour = minute * 60,
      day = hour * 24;

  var countDown = new Date('{{- end_date -}}').getTime(),
      x = setInterval(function() {
      var now = new Date().getTime(),
          distance = countDown - now;
    	document.querySelector('.js-timer-days').innerText = Math.floor(distance / (day)),
      	document.querySelector('.js-timer-hours').innerText = Math.floor((distance % (day)) / (hour)),
    	document.querySelector('.js-timer-minutes').innerText = Math.floor((distance % (hour)) / (minute)),
    	document.querySelector('.js-timer-seconds').innerText = Math.floor((distance % (minute)) / second);
    }, second)
</script>
{% endif %}
Like this screenshot bellow:
Step 2: Include recently added snippet
Now, include snippet file to anywhere you want it display. I would suggest to put it into Product page where increase sale the best. Use bellow structure to for including this snippet:
{% render 'ecg-countdown-timer',
  title: "Special Offer End In",
  end_date: "Sep 30, 2018"
%}
Notice:
- You can change **title **param to any content you want
- With end_date params, you must enter it with the correct format: Month (shorten) Date, Year and **MUST **be in future. For example, today is August 29, 2018, you can enter: Aug 30, 2018
The screenshot bellow is showing how I add code to **Product Template **with Debut Shopify Theme

This is only my suggestion of where should you put this snippet in, you can put it everywhere in your theme. Just remember to follow the correct structure and notice.
Moreover, I just use the very basic style, you can change style by modifying CSS within your theme.
Conclusion:
That’s all, you can see my live theme example here. Hope that my detail tut can help you a little in launching your shop. Please fell free to contact me if you have any issue in trying this.
Thank you all for reading my tutorial. If you like it, share it to your friends and don’t forget to help me a bit by clicking ads or donate to helps me maintain this site.